Over the past two years I find myself using Visual Studio Code (VSC) more and more.
The tool has come to serve me well.
A large part of my focus has now gone into Salesforce development , especially Salesforce lightning.
To ensure that you are receiving the most from VSC make sure you have the right extension and preferably connect yourself to a Salesforce development environment (Its totally FREE).
So lets look at what to install and how to get fully connected.
The Salesforce Snippet :
Visual Studio Code is the go-to code editor for Salesforce developers. It's free, open-source, and available for Windows, Linux, and macOS.
This editor has easy-to-install extensions for syntax highlighting, code completion, and more.
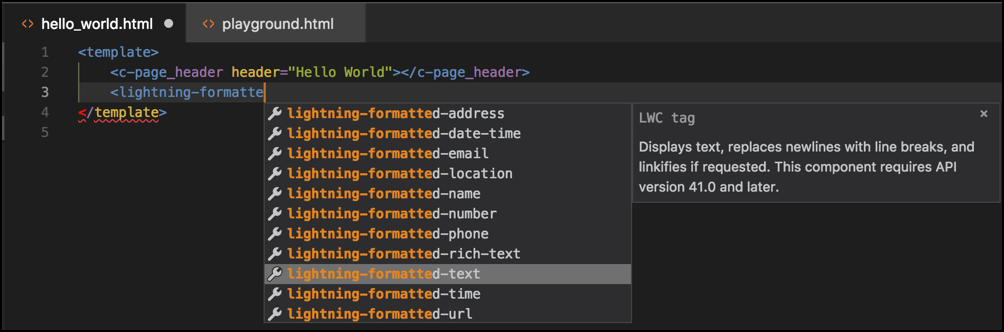 In this project, we install Visual Studio Code and the recommended Salesforce Extension Pack.
- Download and install the latest version of Visual Studio Code for your operating system. If you already have Visual Studio Code installed, there’s no need to reinstall it.
- Launch Visual Studio Code.
- On the left toolbar, click the
 Extensions icon.
 - Search for Salesforce Extension Pack and click Install. If you already have it installed, then you just need to click on the Reload button.
Let's not forget another fan favorite :
Salesforce CLI
Like many other programming languages and models, Salesforce includes a command-line interface (CLI). If you’ve ever used npm, yarn, gradle, or maven, Salesforce CLI will seem familiar to you—just tailor-made for Salesforce development tasks (and if those acronyms look like alphabet soup to you, that’s fine, too).
Salesforce CLI allows you to interact with your Salesforce environments in many ways, like retrieving or pushing code or interacting with data. The CLI consists of several plugins. These plugins provide important specific functionality.
For example, the salesforcedx plugin provides the ability to interact with Salesforce orgs and their data.
For example, the salesforcedx plugin provides the ability to interact with Salesforce orgs and their data.
If you already have Salesforce CLI installed, you can skip this section.
- Download Salesforce CLI using the appropriate link for your operating system:
Operating System Link to Installer macOS https://sfdc.co/sfdx_cli_osx Windows 32-bit https://sfdc.co/sfdx_cli_win Windows 64-bit https://sfdc.co/sfdx_cli_win64 Debian/Ubuntu 64 https://sfdc.co/sfdx_cli_linux
Download the archive from one of the URLs in the manifest, extract the archive, then run the ./install script.Debian/Ubuntu x86 https://sfdc.co/sfdx_cli_linux_x86
Download the archive from one of the URLs in the manifest, extract the archive, then run the ./install script. - Run the downloaded installer.
- After the installation, open a command line prompt, such as cmd on Windows or Linux or Terminal on macOS.
- Run this command to confirm the correct installation:
sfdx plugins --core - You should see something like:
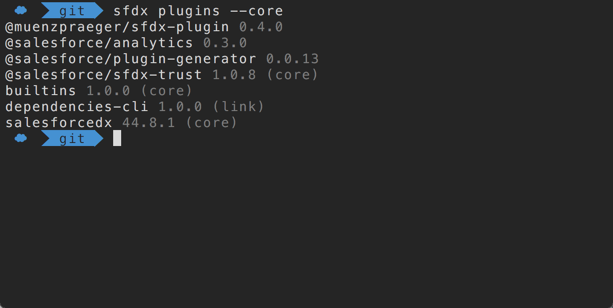
The salesforcedx plugin should be listed as version 45.x.x or higher.
You’re all set with Salesforce CLI! That was easy, wasn’t it?
