Showing posts with label salesforceCRM. Show all posts

Monday, November 11, 2019

Salesforce Lightning - Accordion

So you are looking at adding an accordion to your lightning build?

No problem, lets get cracking.

Accordions became popular in the early 2000's and now we see it everywhere.


A basic accordion :

<button onclick="myFunction('Demo1')" class="w3-button w3-block w3-left-align">
Open Section 1</button>

<div id="Demo1" class="w3-container w3-hide">
  <p>Some text..</p>
</div>

<script>
function myFunction(id) {
  var x = document.getElementById(id);
  if (x.className.indexOf("w3-show"== -1) {
    x.className += " w3-show";
  } else {
    x.className = x.className.replace(" w3-show""");
  }
}
</script>


So in Salesforce the concept stays the same with a slight tweek to the implementation.
In lightning we work with components and this serves as the core of our building blocks.

In this example we will be working with the developer console but personally I find myself a fan of using visual studio code :-)

Select the lightning gear icon and then select developer console:


Once your console is launched:

Select File--New--Lightning Component

For this example we will be calling our component AccordionTest and select lightning Record page for your configuration.


Simply add the following code in the component section (CTRL+SHIFT+1)
Please remove the test code reference if you want to test it.

Add the following to the controller:

({
    handleShowActiveSectionName: function (cmp, event, helper) {
        alert(cmp.find("accordion").get('v.activeSectionName'));
    },
    handleToggleSectionD: function (cmp) {
        cmp.set('v.isDVisible', !cmp.get('v.isDVisible'));
    }
});

This will offer you the simplest start but I will soon write some code for a more production implementation.

Happy Trails
Jerome

Wednesday, August 28, 2019

Multiple approvers for Approval process in Salesforce Classic


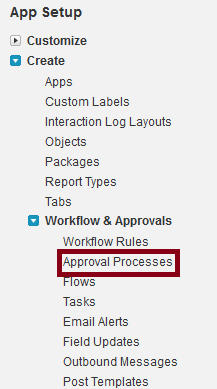
1. Go to Setup >> Create>> Workflow and Approvals >> Approval Processes.


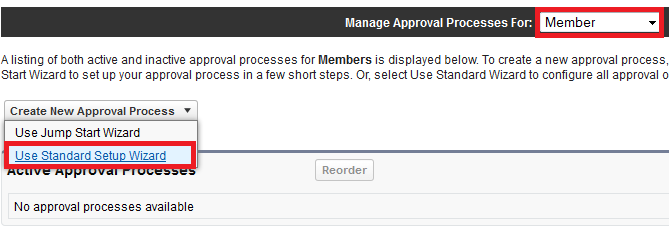
2. Select the object to create approval process.

3. Click "Create New Approval Process" button and click "Use Standard Setup Wizard" link.


4. Enter a name and description for your new approval process.

5. Click "Next" button.


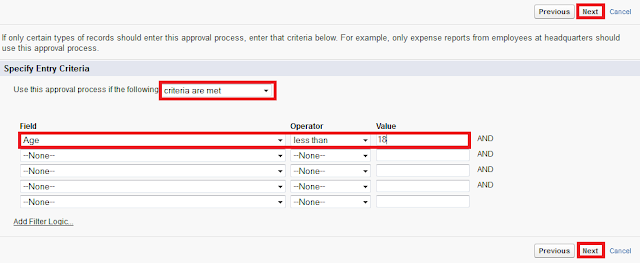
6.  Specify Entry Criteria.

7. Click "Next" button.


8.  Specify Approver Field and Record Editability Properties.

9. Click "Next" button.


10. Select Notification Templates.

11. Click "Next" button.


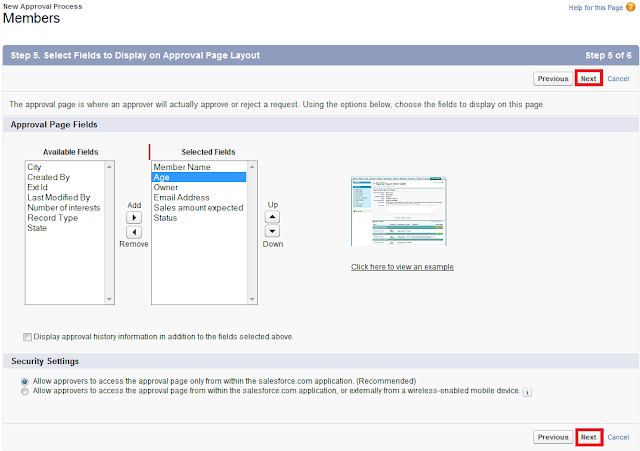
12. Select Fields to Display on Approval Page Layout.

13. Click "Next" button.


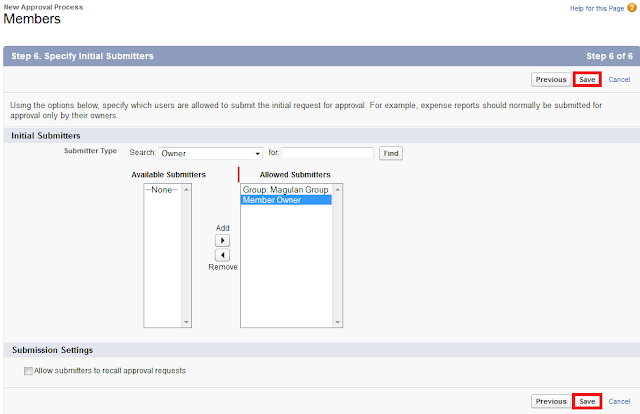
14. Specify Initial Submitters.

15. Click "Save" button. 


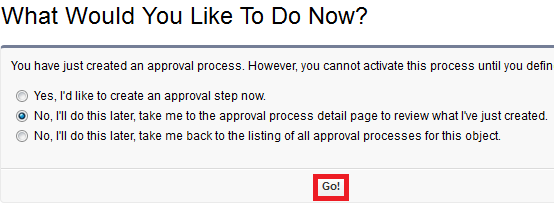
16. Select "No, I'll do this later, take me to the approval process detail page to review what I've just created".

17. Click "Go" button.


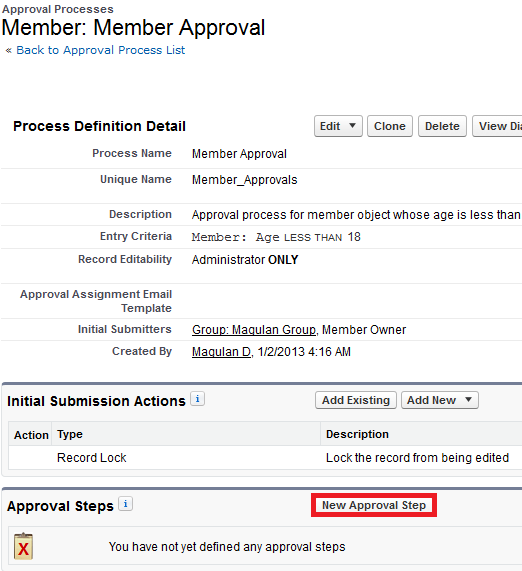
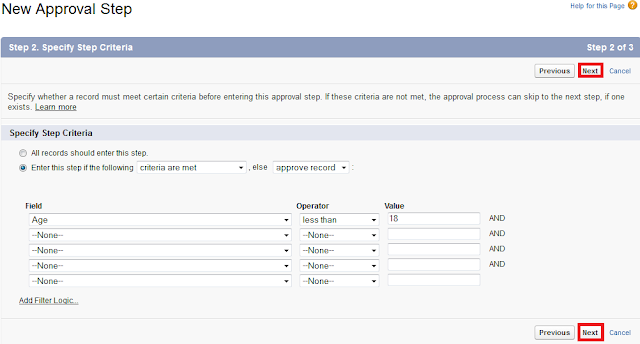
 18. Click "New Approval Step' button.


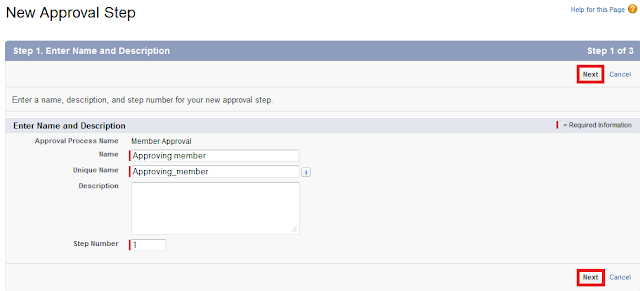
19. Enter Name and Description.

20. Click "Next" button.


21. Specify Step Criteria.

22. Click "Next" button.


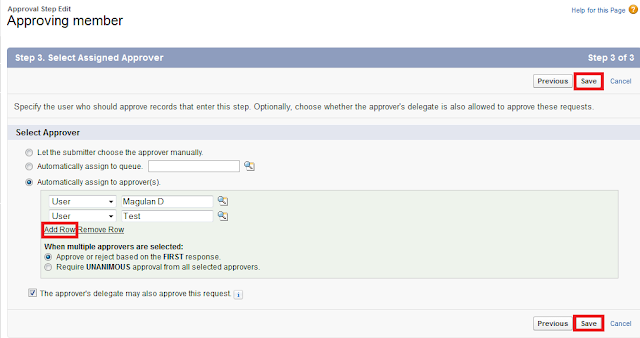
23. Select "Automatically assign to approver(s)".

24. Select the "Queue" or "User" or "Related User".

25. When multiple approvers are selected, select anyone of the following

    a. Approve or reject based on the FIRST response.
    b. Require UNANIMOUS approval from all selected approvers.

26. Click "Add Row" link to add multiple approvers. 

27. Click "Save" button.


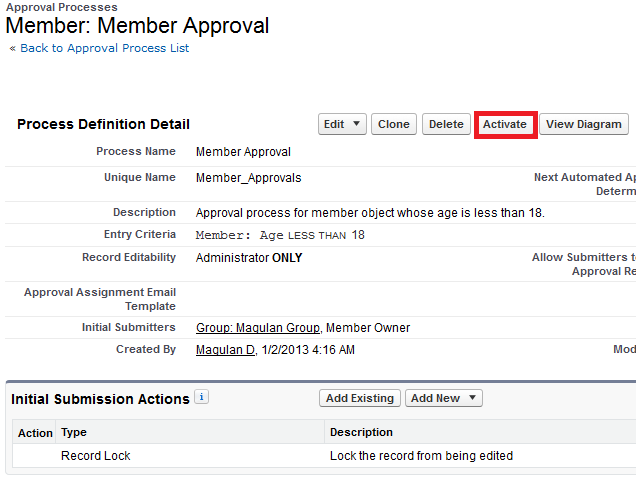
28. Click "Activate" button to activate your approval process.


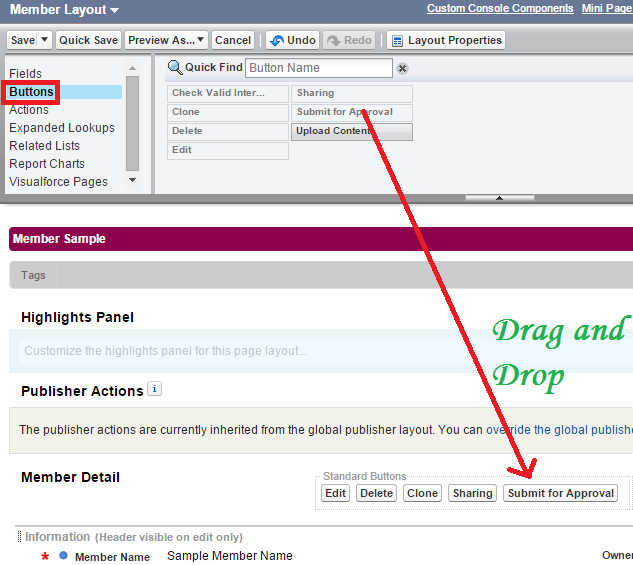
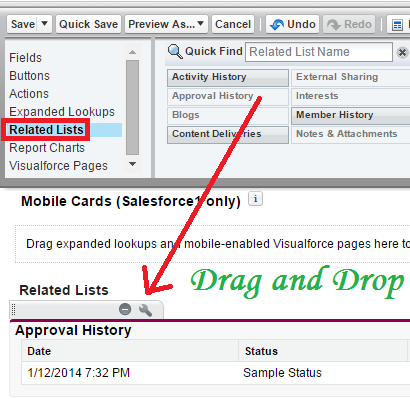
29. Go to the Object's page layout and add Submit for Approval button and Approval History related list.


30. Add "Submit for Approval" button.


31. Add "Approval History" related list.


Output:


Generate reports from Opportunities using a Visualforce Page in Salesforce

  Step 1: Create a Visualforce Page Go to the Setup menu in Salesforce. Search for "Visualforce Pages" in the Quick Find box and c...